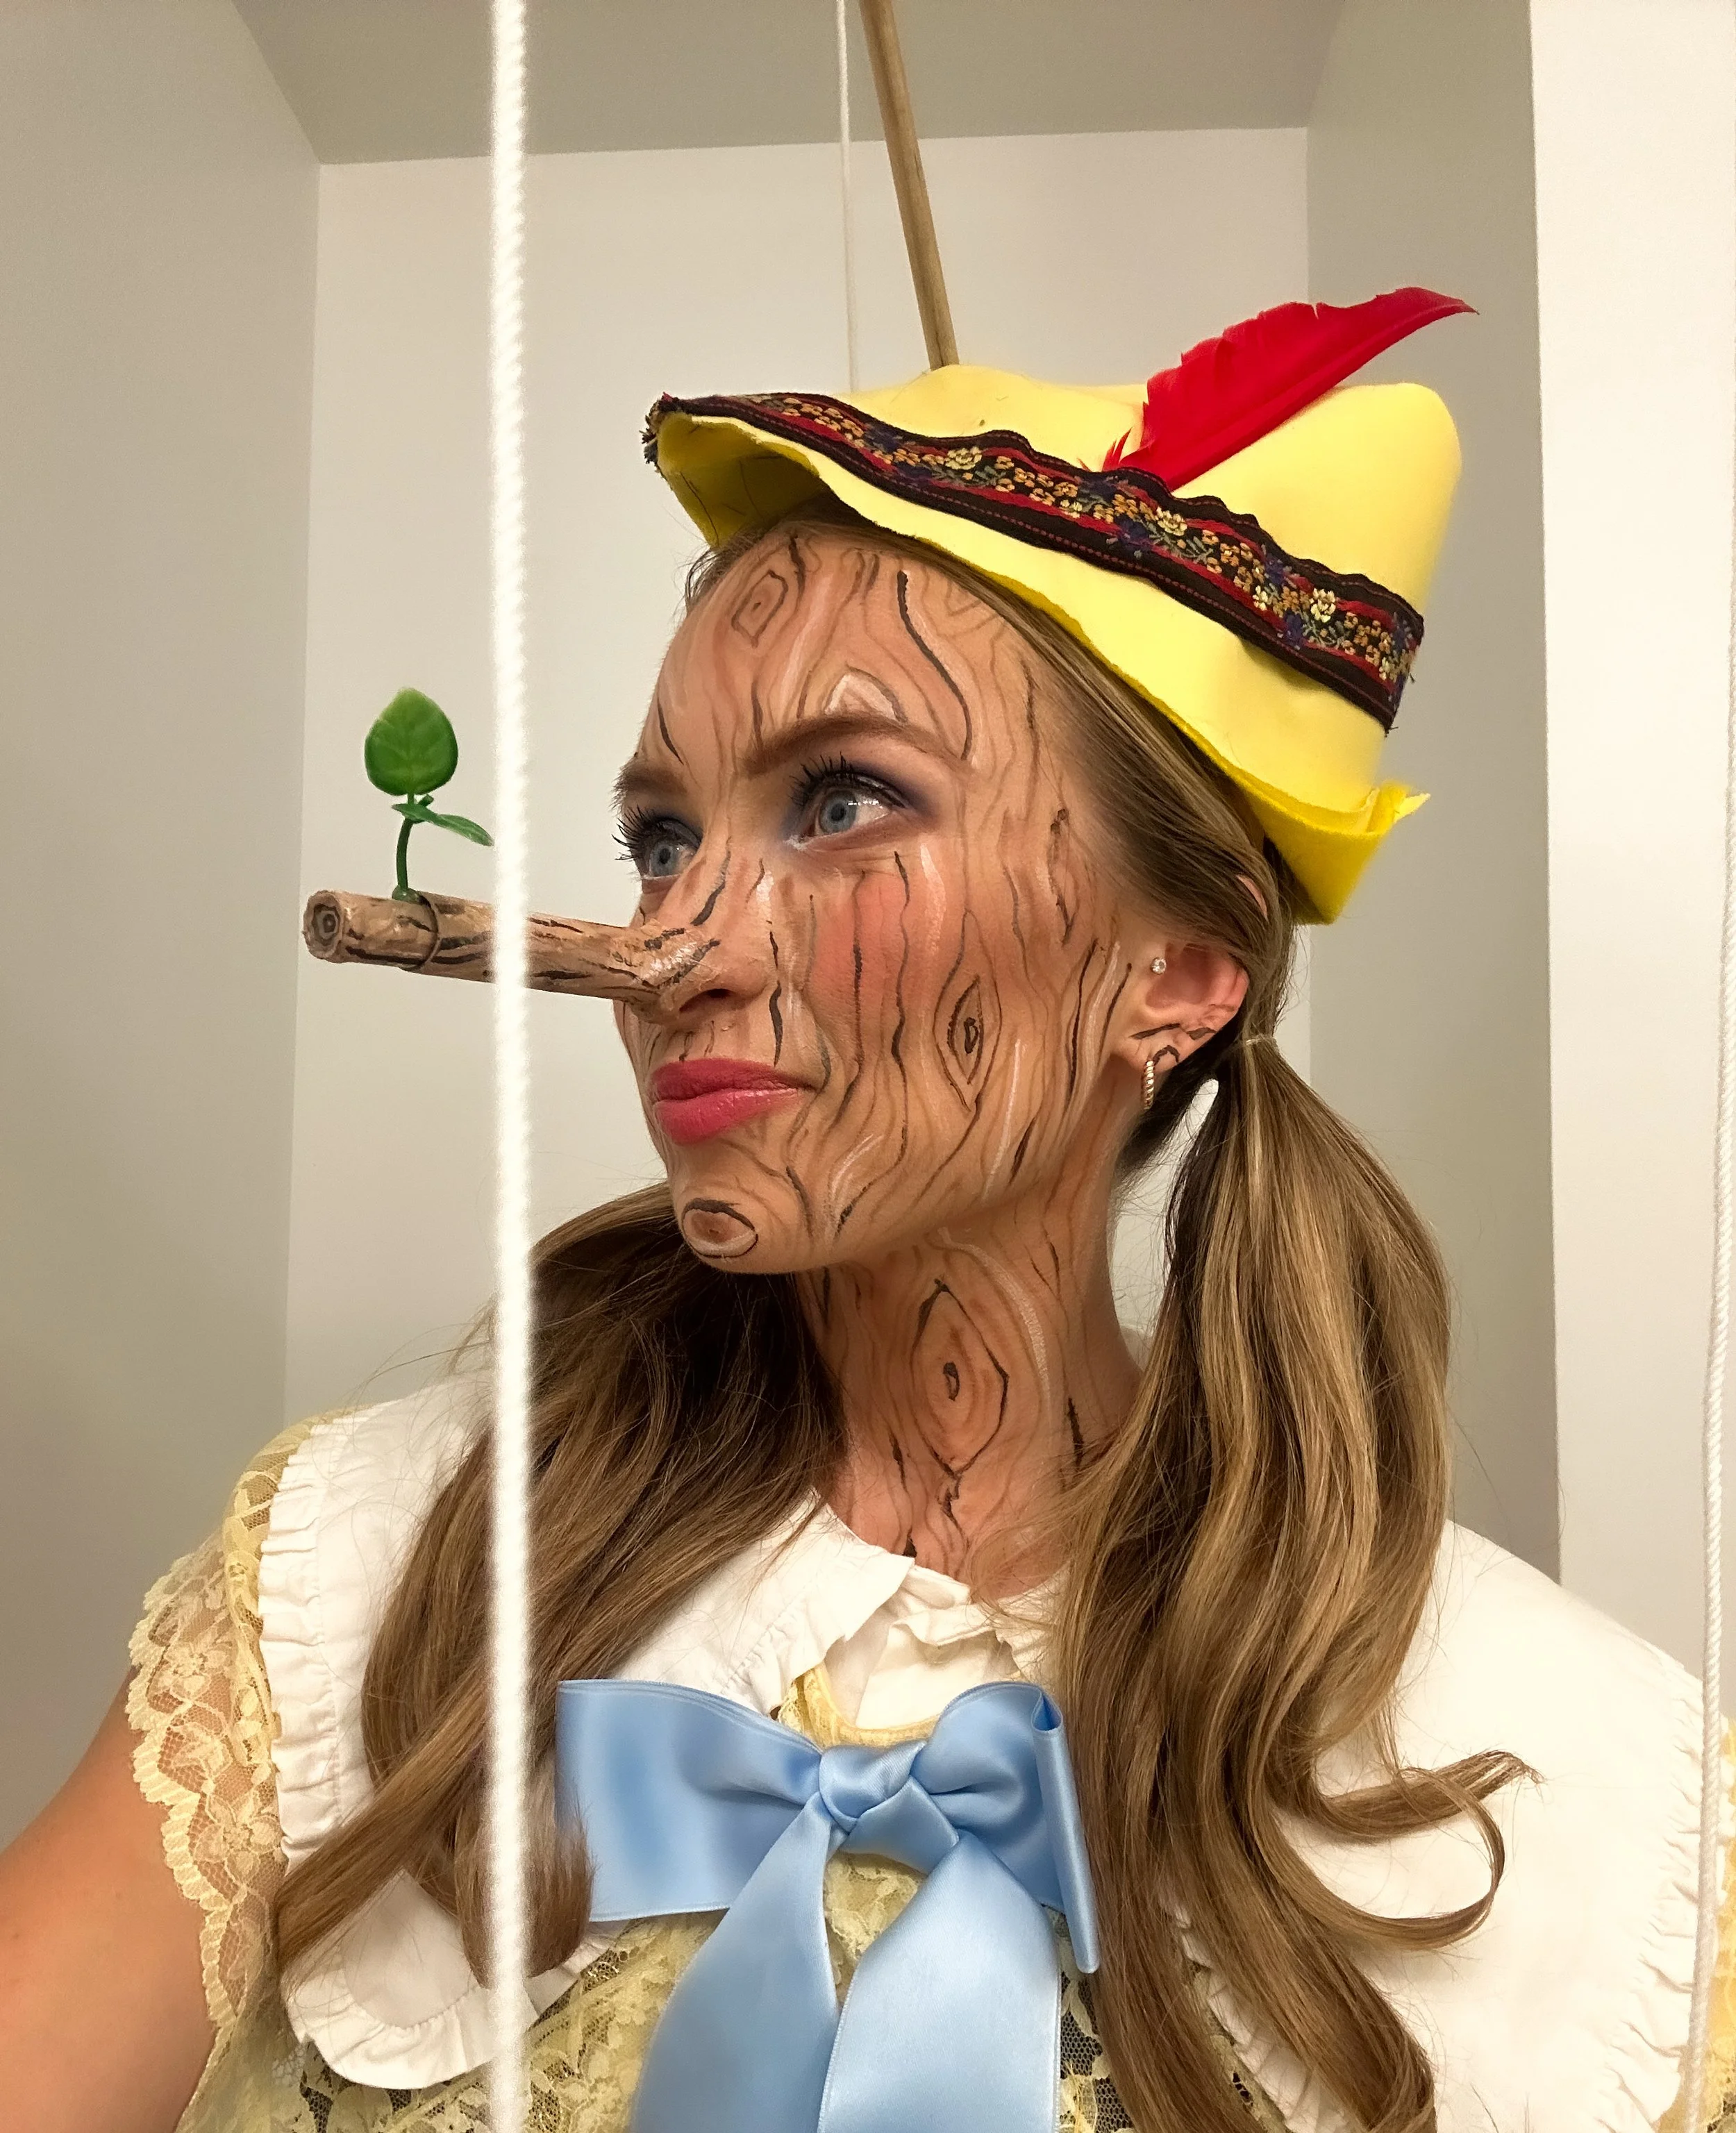
Pinocchio Costume with Moveable Nose
After watching the live action Pinocchio movie, I became obsessed with the idea of a moving nose costume. I kept thinking of those birthday party favors that extend! I did a lot of research and couldn’t find a way to make it move “on it’s own” without creating a motor/having to have a full mask of some sort that wrapped around to the back to attach to the controller. That’s when I discovered the tampon method….
Materials Needed
Nose
Cardboard Tampon (in my amazon here)
Liquid latex (in my amazon here)
Modeling putty (in my amazon here)
Costume
Lederhosen dress (in my amazon here)
Tulle skirt (in my amazon here)
Black vest (I sewed mine from black fabric)
Yellow shirt (mine was thrifted)
Blue bow/ribbon (mine is a hair bow from Hill House)
Marionette Strings
Headband (in my amazon here)
Pushpin (in my amazon here)
Steps
1. Embellish the costume with trim
I bought the leiderhosen dress on Amazon and sewed up a little black vest but you could buy one, as well.
My favorite trick for making a store-bought costume look custom is to add trim! I picked up some gold trim from Hobby Lobby and used it to outline the vest and the end of the skirt, giving a cohesive look. I also wanted to add a little detail to the vest so I cut out felt flowers and glued them on.
2. Marionette strings
Picture the marionette strings like one of those Tweedle Dee Tweedle Dom propeller hats but on a headband. I first started by securing a dowel to a thick headband using duct tape – this will later be hidden by the hat.
Sew the hat ( I followed this tutorial). I used felt because it’s thick enough to hold the shape but I didn’t like the super bright yellow color so I put a layer of thin lighter yellow fabric on top. Once it’s done, create a small hole at the top of the hat to push the dowel through. I just cut a hole with scissors.
Attach two lightweight wooden strips to the dowel with a pushpin. Noted above but I found thin foam “wood” at the art store which was perfect. You could use other materials but you avoid anything heavy because it needs to stay put on top of your head.
Poke a hole in the end of each wooden board and tie your marionette strings on. Add loops at the ends for your wrists and ankles.
3. Makeup and nose
I drew the wooden pattern on my face with a regular eyebrow pencil, a gel eyeliner and white eyeshadow to create highlights. I looked at pictures of woodgrain and tried to mimic the patterns.
Paint the tampon to match the woodgrain on your face. I used a mix of paint and makeup but recommend just painting it because the makeup smudged. You will also need to “close” the end of the tampon so you don’t see the hole - I traced it onto a paper bag and cut it out, leaving little flaps like a paper doll, which I then glued to the inside of the tampon. My favorite touch was hot gluing on a little leaf to the end of the nose!
To secure it to your nose, start by warming a quarter size of modeling putty in your hands. Roll it around in your hands for around a minute (long time!). Then press it onto the end of your nose. (I had to try this multiple times to get it to stay. I found creating a larger base - spreading putty onto the sides of my nose helped). Press the tampon on top and then apply the liquid latex to the base of your nose and the tampon to create a layer that will keep them connected. Once dry and feeling solid, go over with makeup.


